Three ways to structure your blog posts for more engagement

May 12th, 2015

If you’ve already set up an editorial calendar for your blog and you have planned what content comes out when, the next step is to write it.

I know. This can be overwhelming. It’s hard enough choosing what to write about.

The first thing you have to do is just start. Thank you, Captain Obvious, you say.

I know.

But once you’ve started, there are some frameworks we’re going to talk about in a minute that will help you structure your writing so it makes sense. But when you start writing, don’t force it. That will only make it sound canned and unnatural. So I suggest you just write. Dump everything out.

Once you have your rough information down and you’re ready to give it shape, whether you are writing a blog post, a book, or even a presentation, there a couple of ways to structure that information so that it makes sense to the audience. Here are three.

The Term Paper

The first structure is probably the most well-known. I call it the term paper. You are probably already familiar with this format: you have an introduction, a line explaining that you’re going to tell the audience these (three) things, then you tell them those (three) things, and conclude it by telling he audience what you just told them.

I will never forget Dr. Rummage drawing this shape on the board in the front of the room:
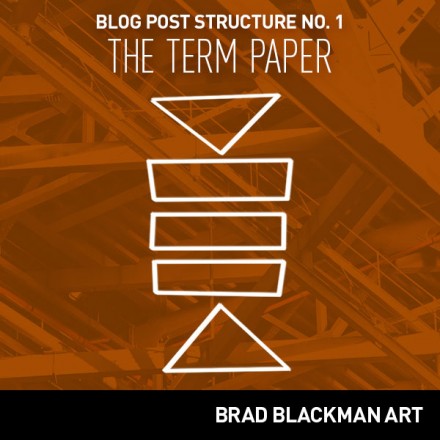
I used this formula all through high school and college, and it worked. (I consistently got As on my papers except when I used the dreaded comma splice. That always cost me a letter grade.)

This format is kind of stiff and formal so it doesn’t always lend itself to blogging, but it works really well for presentations. I like to think of blogs as existing somewhere between an email and a magazine article. People don’t want to read term papers or research papers. (Not even the teachers!)

But this format works really well for a presentation or a podcast and bullet-point style blog posts. It tends to be kind of dry when you read it. And since we’re talking about blogging for the art world, dryness may not great for your blog. But if you use the term paper structure, do what you can to make it engaging.

The Transformation

Next is what Pat Flynn uses when he drafts blog posts. I’m calling it “The Transformation.” It is outlined in episode 2 of SPI TV, and it is a variation on the ever-popular bullet point format but it has a twist: he starts out by considering what transformation he desires in his readers. It might be a call to action to sign up for an email list or it might be more personal, calling people to change their mind about something or to try something new.
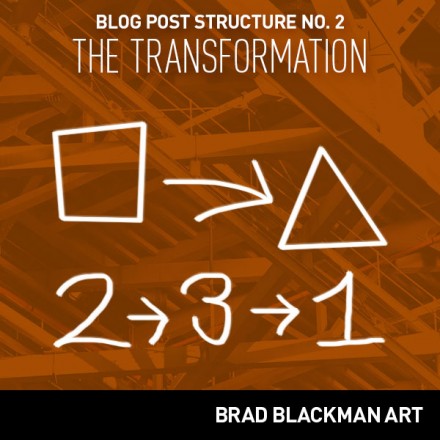
The other important trick is that he lists his bullets 2, 3, then 1. The most important thing is last since that’s what you’re more likely to remember. You might be tempted to list the most important thing first. But if you save the best for last, your readers are less likely to forget.

The Hero’s Journey

This is a big one. I’m listing it last because it is the most important. (See?)

The Hero’s Journey is most powerful form of narrative we have. Every great story follows this format in some way. Joseph Campbell wrote about this in great detail in The Hero with a Thousand Faces. He called it “monomyth.” The idea is that we only have one basic story that we tell, and that story has a thousand variations.

It works like this: a reluctant hero or protagonist has a problem, and he embarks on a journey to deal with that problem. Along the way meets a guide or acquires some kind of device or tool, and is tasked with slaying the dragon or confronting the Black Knight (not the Monty Python sketch). In the end there are two possible outcomes: success or failure. Most often the great stories end in success but there is always a moment where it looks like all is lost.
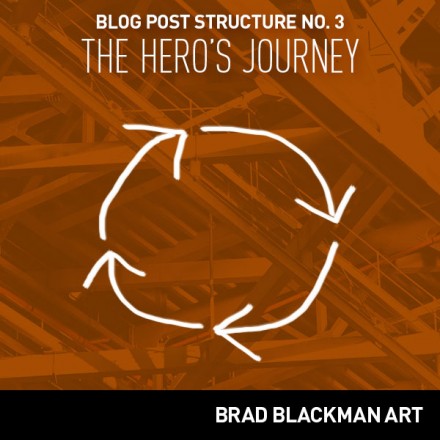
Donald Miller uses this to great effect in his most recent book, Scary Close. The entire book follows this framework. Even individual chapters follow this framework. I haven’t read this book yet, but I’ve listened to some of his podcast interviews about it, and it sounds like it will be really good when I do get around to reading it. (I’ve read some of his other books and enjoyed them.) He outlines the 7 steps in the journey in his free ebook “How To Tell A Story.”

While this sounds very formulaic, it works.

It has worked for thousands of years. It worked for the Greeks. It works today in every great movie, from “Star Wars” to “Harry Potter” to “Bridget Jones’ Diary.” Even Ninjago, a favorite with my preschoolers, follows this framework.

And you can put it to work in your blog posts.

Sure, the Internet loves list posts because they are easy to digest and you can get a lot of hits really fast by publishing list posts. But if you want longevity, if you want to start a movement, tell a strong story that people can relate to.

This “Hero’s Journey” isn’t an approach I’ve really used before on my blog, but I do plan on using it when the time is right. Most of my posts have been of the 1-2-3 variety (or 2-3-1 for that matter, including this one) but when you need a narrative, this is the best approach. It’s the time-honored framework for telling a story.

Perhaps the only recent example is the post about painting with my son Greg. I was called to an adventure: make a painting with him. And at first I resisted the call to adventure, especially when Greg made his own mark on the canvas, but in a sense he was the guide I needed. But I went along with it. What demon did I have to slay? I think it was my own fear of losing control of the painting. But the end result was better than I could have imagined, and we are both better for having bestowed our artistic gift upon the world.

Which framework will you use next?

Now you have three different frameworks for structuring your blog posts, whether you are writing about your art, your influences, or your technique. What will you use on your next post? For your next presentation? Let us know in the comments.

Photo Credit: jonesor via Compfight cc

The Secret to a Super Fast Editorial Calendar for Your Art Blog

May 7th, 2015

Congratulations, you have given yourself a schedule for posting your blog each week.

But it’s the night before your post is supposed to go live, and you don’t know what you’re writing about. Cue a flashback to those late nights in college where you put off writing your term paper until the night before it’s due.

You wail and moan: Why didn’t I plan ahead and schedule this weeks ago? What am I going to write about, anyway? Why am I not using one of those editorial calendars I’ve heard so much about? And how the heck am I supposed to actually use one? I’m an artist! I’m a free spirit!

Let me show you how.

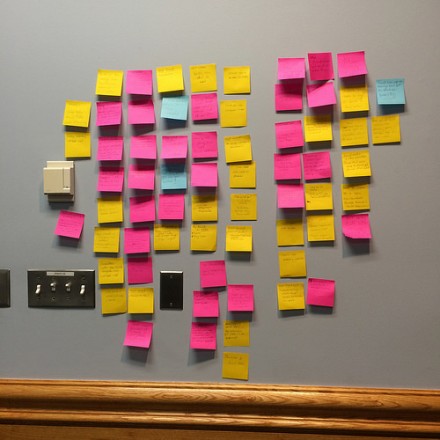
Recently, I discovered a new way to approach your editorial calendar or content calendar. A few months ago, Pat Flynn did a YouTube show about how to quickly write a book draft using sticky notes.

The idea is to use color-coded sticky notes to create an outline for a book: use one color for chapter headings or topics, and then another color for sub-topics within that chapter, mind-mapping them out on a table. Pat used fly-fishing as his example. One chapter can be about, say, fly fishing lures, and within that chapter are different kinds of lures.

You can apply this same kind of thinking to planning your blog’s content.

In fact, this is how Pat and his videographer planned the video show. Each month is devoted to a particular topic, like productivity or networking, and the weekly episodes for that month go into detail about those topics.

This gave me the idea to do the same for my blog.

(Can’t see the video? Click here.)

I started by taking out a single tall Post-It® Note, and I made a list of all my blog categories. I even added some I haven’t written about yet.

Then, on a page in my Moleskine notebook I put down one category at the top, followed by 10 bullet points. I brainstormed 10 topics I could talk about within that category. I repeated this for several pages.

If I have a dozen categories, and 10 bullet points per category, I can easily come up with 120 topics to write about. If I blog once a week, I now have a framework for the next two years’ worth of blog posts!

All I have to do is write them. No more of this “what am I going to write about?” treadmill. I can spend a Sunday afternoon at the local coffee shop and rough out four or five posts, which I can edit and clean up a few days before they go live. Or I might do it all at once and batch a month’s worth of posts over a weekend. We’ll see.

So how can you put this into action?

Take a look at the broad topics you want to talk about on your blog. Jot down 10-12 possible sub-topics per category.

Here are some example categories an artist might want to explore:

  • color
  • themes/motifs in one’s work
  • influences
  • practices/techniques
  • philosophy/manifesto
  • books/films/etc. that inspire you
Pick one of those topics for the next month. Explore four things within that topic, in depth, posting once a week. Then the month after that, move on to the next category, and write about it for four weeks. That’s it!

But that’s boring.

If writing about a particular theme all month long sounds tiresome, you might try cycling through four different themes in a month, devoting one theme to each week. You could keep a pretty strong recurring schedule that way, too. For example, the first week of the month can always be about color, the second week of the month is always about techniques, and so on.

Putting this into action

I’m really excited about this, because now I have an actual framework for creating content for my blog. I have a rough idea of what I’ll be writing about for the next year. I can always change my mind. But this takes a lot of the stress out of figuring out what I’m going to write about. Now I know. I just have to write it. It’s almost like an assignment this way, and closer to a true editorial calendar like magazines use.

So, May 2015 is going to be about blogging around here. More specifically, blogging for artists.

Give it a try! Let me know how it goes. I’m going to be trying it myself, and you’re going to see how it works out for me, too. Feel free to share your results in the comments.

Photo Credits

Header Image: ‘S’ via Compfight cc Stressed student Sticky Notes

Content Calendars for Artists

September 30th, 2014

Quick, what are you writing about on your blog next week? Next month? Next year?

And your social media channels? What will you be saying on Twitter and Facebook and LinkedIn?

That’s where an editorial calendar or a content calendar comes in handy. It’s a way of planning ahead for what you are going to be doing content-wise in the future.

It’s hot stuff in the blogging world right now, but it really is not all that new. Magazines and newspapers have been doing it for hundreds of years.

If it sounds overwhelming or complicated, don’t freak out about it. Let me break it down for you.

All a content calendar is is just a calendar that indicates what kind of content will be published and when. (You can tweet that)

For example, Time magazine has for many years published an annual “Person of the Year” issue. Pretty much every magazine out there has at least one annual issue. With graphic design magazines such as Communication Arts, pretty much every issue is an annual issue devoted to a particular thing, such as regional design, international design, print design, web design, small firms, in-house departments, photography, illustration, etc.

So how can you apply this to your own blog?

The first thing you can do is look at all the different types of content you create on your blog. You can take a sort of newspaper or magazine column approach, where every so often a particular topic or theme or format appears. Or run with a series and know that next month, you will be writing along a particular theme.

Let’s look at some formats you can try.

Examining various types of articles you can write or talk about is a great place to start. Figure out what you have to say, and build a structure around it.

Question and Answer

The advice column has been popular in newspapers for years. People love this format. A variation of the advice column is the Q & A or question & answer format. This can be a regular feature of your blog or podcast, or you could start something based on this format alone.

In fact, Pat Flynn of Smart Passive Income did just that: he started an entirely new podcast called “Ask Pat” that is dedicated to questions about online business. People call in with questions and he spends 8 – 10 minutes answering their questions about internet business, followed by an inspirational quote.

So on your blog you could have a regular feature based around this Q & A structure.

Art business coach Alyson Stanfield uses a variation on this with a weekly feature called “Deep Thought Thursday.” Every Thursday she poses a question or an idea and lets her audience discuss it.

The post itself is really short: a paragraph or so posing a situation, followed by “What do you think?” There is a lot of discussion because it’s often a topic artists are very passionate about and they have a lot to say about it.

So think about working format like that into your regular blogging: pick a day of the week and work a Q & A or “deep thought” format into your schedule.

Interviews

Photo Credit: pasukaru76 via Compfight cc

The interview or dialogue format works really well, too, especially when you are running a podcast. Sometimes people may feel like they are being lectured to or preached at when listening to a monologue. If you’re monologuing, you better be entertaining or otherwise compelling. Find a way to break it up with pictures in text or music on a podcast. My friend Jeff Goins splits up sections of his podcast The Portfolio Life with little guitar riffs. Of course, This American Life is famous for doing that in between its three acts.

Tools

Image Source

We are naturally nosy. Er, I mean, curiousWe love looking at others’ toolboxes. How do you do what you do? Why do you do it? People love to learn how “the pros” do it. Blog about your favorite brushes, clay, spray paint nozzle tips, sewing machines. Why do you prefer those tools? Plus, if you’re savvy about making money with your blog, you can link to the tools or gear you’re talking about and earn a small commission on sales.

The Calendar on Your Wall

So we’ve looked at some content types that you can use as you plan ahead what you will put on your site.

Next, let’s look at the actual calendar for inspiration. There’s plenty to talk about.

Upcoming local events

You can report on things that are coming up soon in your area. For example, every Friday afternoon I get an email from Nashville Arts Magazine listing 5 or 6 things happening on the Nashville Arts scene this coming weekend. I might see something like…

  • One gallery has a show opening tonight, and it features three artists working for social justice. All proceeds go toward their cause.
  • On Saturday, there’s a family event at a certain park. It has jugglers! The kids would love it.
  • The indie theatre has a matinee on Sunday, and it’s a show that has been getting great reviews. Maybe we can get the grandparents to watch the kids and we can go.
And so forth. It’s a great little service and has inspired me to get out and do something on the weekend, especially the First Saturday Art Crawl.

National or global art events

Every October the London Frieze Art Fair happens. And every December, Art Basel Miami Beach takes over the city. The weather is nice when it is cold everywhere else, and there is lots to do even if you don’t buy a ticket to the actual event. Write up your thoughts on what is going on even if you aren’t there — there is plenty of actual coverage you can piggyback on.

Then there are the biennials — events that happen every 2 years such as the Whitney and Venice Biennials. Maybe save up for it and write about your trip.

You don’t have to piggyback on the big art events, either. You can find a way to do that with big sports events everyone knows about such as The Super Bowl, The World Series, FIFA World Cup, etc.

Seasons

Fall just started where I live, and the kids have been in school over a month. If that’s the case for you, you can refer to it on your blog directly or in passing remarks:
I’m in the studio, the kids are back in school, and seeing yellow school buses has inspired me to experiment with the color yellow.
It speaks to your personality and shows you’re an actual person, not just an art-making machine. Maybe you are an art-making machine but it shows you have a life outside your art and that you’re aware of the world around you. It makes you more relatable.

Holidays

This is where editorial/content and marketing calendars come together: do marketing based on holidays and blog about it as well. In the U.S. we celebrate Thanksgiving in November. You can write about the things you’re thankful for, and give all customers this special offer if they place an order between November 1 and 30.

Photo credit: Natasha Mileshina via Compfight cc

In January, everyone’s mind is on new commitments and renewal especially after a month or two of over-eating and over-partying.

The past few years every January I’ve blogged about my words of the year — one-to-three words that are a theme or mantra for the upcoming year.

The only thing I advise against is posting a “My Top Ten Posts This Year” kind of post at the end of the year. Yes, I’ve done this before, but now I feel like it seems overdone and self-serving. “Look at these wonderful things I did this past year!”

While I think it is good to celebrate your accomplishments, don’t dwell on them (or your failures, either). Rather, it might be better to write about the top ten things you learned this past year.

Remember, the internet gets quiet in December so you might want to make it a light month content-wise, and prepare some killer posts for January while everyone is on vacation. You gotta hustle!

Setting Up Your Calendar

If you’re still with me, here’s your chance to plan how to set up your own calendar.

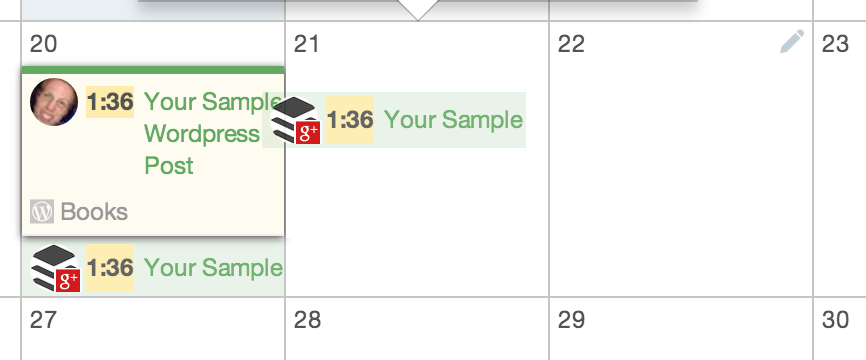
Recently I saw a nifty graphic on the Buffer.app blog where it showed a content calendar using graphic symbols for various content types on different days.

You can do something similar. You’re a visual person — and these graphics can take on a whole new dynamic since for you, you can extrapolate a number of ideas from just one visual. That’s the beauty (and the curse) of a visual mind: just one image can fire the imagination to go hundreds of directions. The visual is a cue for what to talk about on your blog.

You can set your icons at regular intervals, but you can also see when articles will fall, such as on a holiday.

Resources

Of course there isn’t a right or wrong way to do a content calendar. You just need to plan ahead if you are going to get better at your blogging, and be intentional about it all.

There are a number of plugins and resources out there to help you get where you want to go. Here are a few:

Editorial Calendar

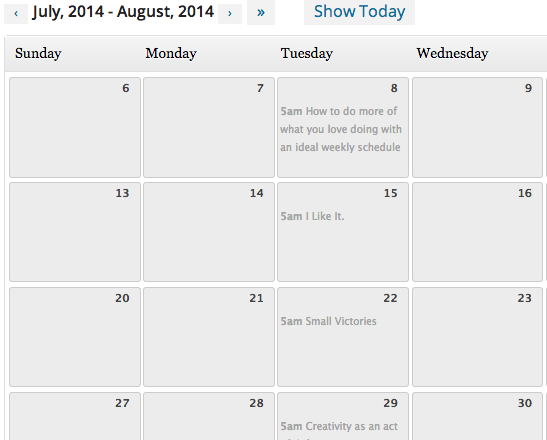
This is a great WordPress plugin, and I use it. It lets me see at a glance what posts are in the pipeline. You can drag and drop posts to different days and set what time of day they will post. Here is a screengrab of how it looks if I go back to July 2014:

Kapost

I’ve never used it, but I read about it on the Buffer blog, and it looks pretty interesting since it lets you identify different content types.

CoSchedule

This is a premium WordPress plugin that allows you to manage social media and blog posts. It’s something I hope to use at some point in the near future. It looks pretty sweet.

Roll Your Own

You can set up an Excel or Google spreadsheet to act as your content/editorial calendar. HubSpot has a nice Blog Editorial Calendar Template.

Personally, right now I am using the free WordPress Editorial Calendar plugin that I mentioned above, and the free version of SocialOomph to manage my blog-specific tweets using the social media checklist that I wrote about recently. That being said, a spreadsheet would probably be a good idea, but I’m not really a spreadsheet guy.

Take a Deep Breath.

Now, take a deep breath, and walk around the block. Now that you’re back, sit down and think about what you’re going to do for your content calendar. At the very least, establish a regular posting schedule so people can come to expect something of you, and so you can expect something of yourself!

Once you find a rhythm, you’ll be able to spot what types of content you create and putting it on a schedule can make things easier for you in the long run.

What about you, have you used a content calendar before? What has helped you the most about it? I’d love to hear from you about your experience with content calendars, especially for artists.

PS: You might want to also go back and check my checklist for writing blogs and scheduling social media, as well as Buffer’s much more comprehensive Complete Guide to Choosing a Content Calendar: Tools, Templates, Tips, and More.

Let me know how it goes!

How to Write Blog Posts Faster With a Checklist or a Template

September 9th, 2014

Recently I was wrapping up a blog post, trying to make sure I had all the t’s cross and and i’s dotted. I thought to myself, I really should make a checklist of all the things I need to do to streamline my blog post writing process, in case I need to hand off something to someone else.

So I did just that: I made a list of all the things I have to do to get each post out the door.

If I can just jump into what I need to do instead of spending a bunch of time thinking about it, I can do things a little faster. Use my energy making the thing instead of figuring out how to do it.

So a checklist or a template can speed up that process even though it is something I do a lot. I’ve been blogging for a while now with this format, but there’s always something that I might forget to do until after it has already been posted.

My own checklist

  • Headline (this changes a lot)
  • the post itself (duh)
  • excerpt/meta description
  • SEO keyword(s)
  • category
  • Featured Image: 980 x 440 (with 440 x 440 square in middle clearly visible). Might contain title?
  • Shareable Image: 1000px wide – should contain a hook-y statement that resonates with people to be shareable.
  • support images/illustrations

Michael Hyatt’s 6-part template:

Naturally, Michael Hyatt, template master extraordinaire, has a template for writing blog posts. He has a video that covers the following tips:
  1. Headline: write something that will pull people into the body of the post. He recommends the book Writing Advertising Headlines.
  2. Lead paragraph: immediately relevant, explains what people will get in the rest of the post.
  3. Relevant image: Pictures catch the eye and pull people in.
  4. Personal story: Nothing works quite like stories. They connect with people and pull them deeper into the content.
  5. Scannable content: short paragraphs, short sentences, simple words. Use bulleted lists. Help people feel a sense of progress.
  6. Ask a question: Invite others into the conversation, ending with an open-ended question. And then participate in the discussion.

Social Media promotion schedule

On Pinterest the other day I discovered this schedule for publicizing your blog post on Twitter. I think I saw it on my friend Kyle Reed‘s feed. (If it wasn’t you, Kyle, it should have been. ;-))

  1. On publish: “New Blog Post: (headline)” – sent when blog post goes live
  2. Same day, 2-3 hours later: Ask a question.
  3. Next day: Cite a fact
  4. Next week: Share a quote
  5. Next month: Add intrigue. “See how…” “Why…”
  6. Next _____: Optionally, additional messages can be scheduled for the three-month mark or beyond

What do you do?

I’m always interested to see how other people write. Do you do anything like this to speed up your process? I’d love for you to leave a note in the comments.